Correctly selecting your custom USB cables parts can be a daunting task for first timers looking at a variety of options in the store. Fully grasping what parts go where or what connectors you need can be confusing at first. With so many options to select from and all sorts of customizable accessories that add a little extra flare it can make the process tricky. Whether you’re attempting your first DIY kit, or trying to select the right cable parts for the pre-built options this will help break it all down for those just entering into the customized keyboard world. So let’s go over all the cable parts, what they do, and where they go in the assembly process. Keep in mind this is not a DIY tutorial, simply an explanation of all the parts in our USB cable build. If you want step-by-step instructions on how to assemble everything, check out our YouTube tutorial videos or check out the blog for future posts on building a DIY kit.
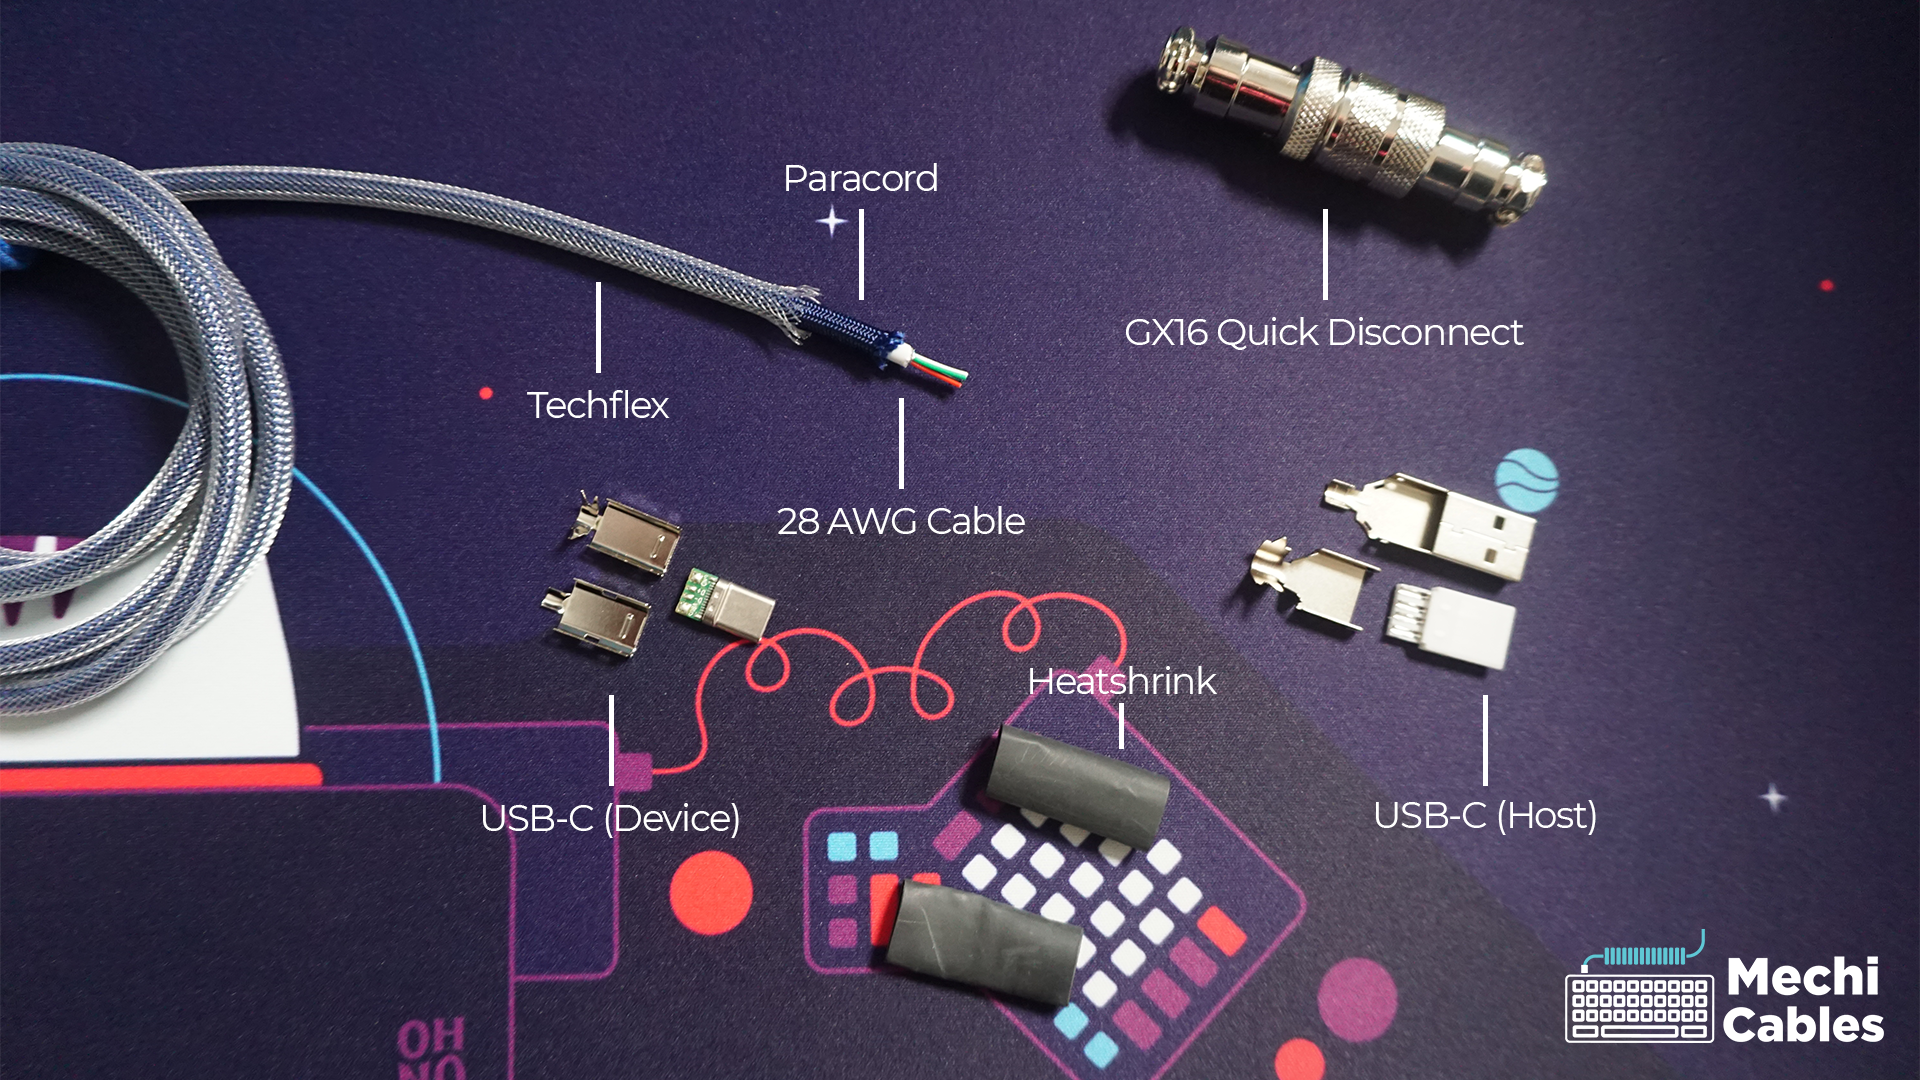
So let’s take a look at all the parts of a keyboard USB cable:
1: Cable – 28 AWG wiring
2: Paracord (inner sleeve)
3: Techflex (outer sleeving)
4: Quick Disconnect
5: USB Host (typically USB-A)
6: USB Device (USB-C, USB-Mini, USB-Micro)
7: Heatshrink
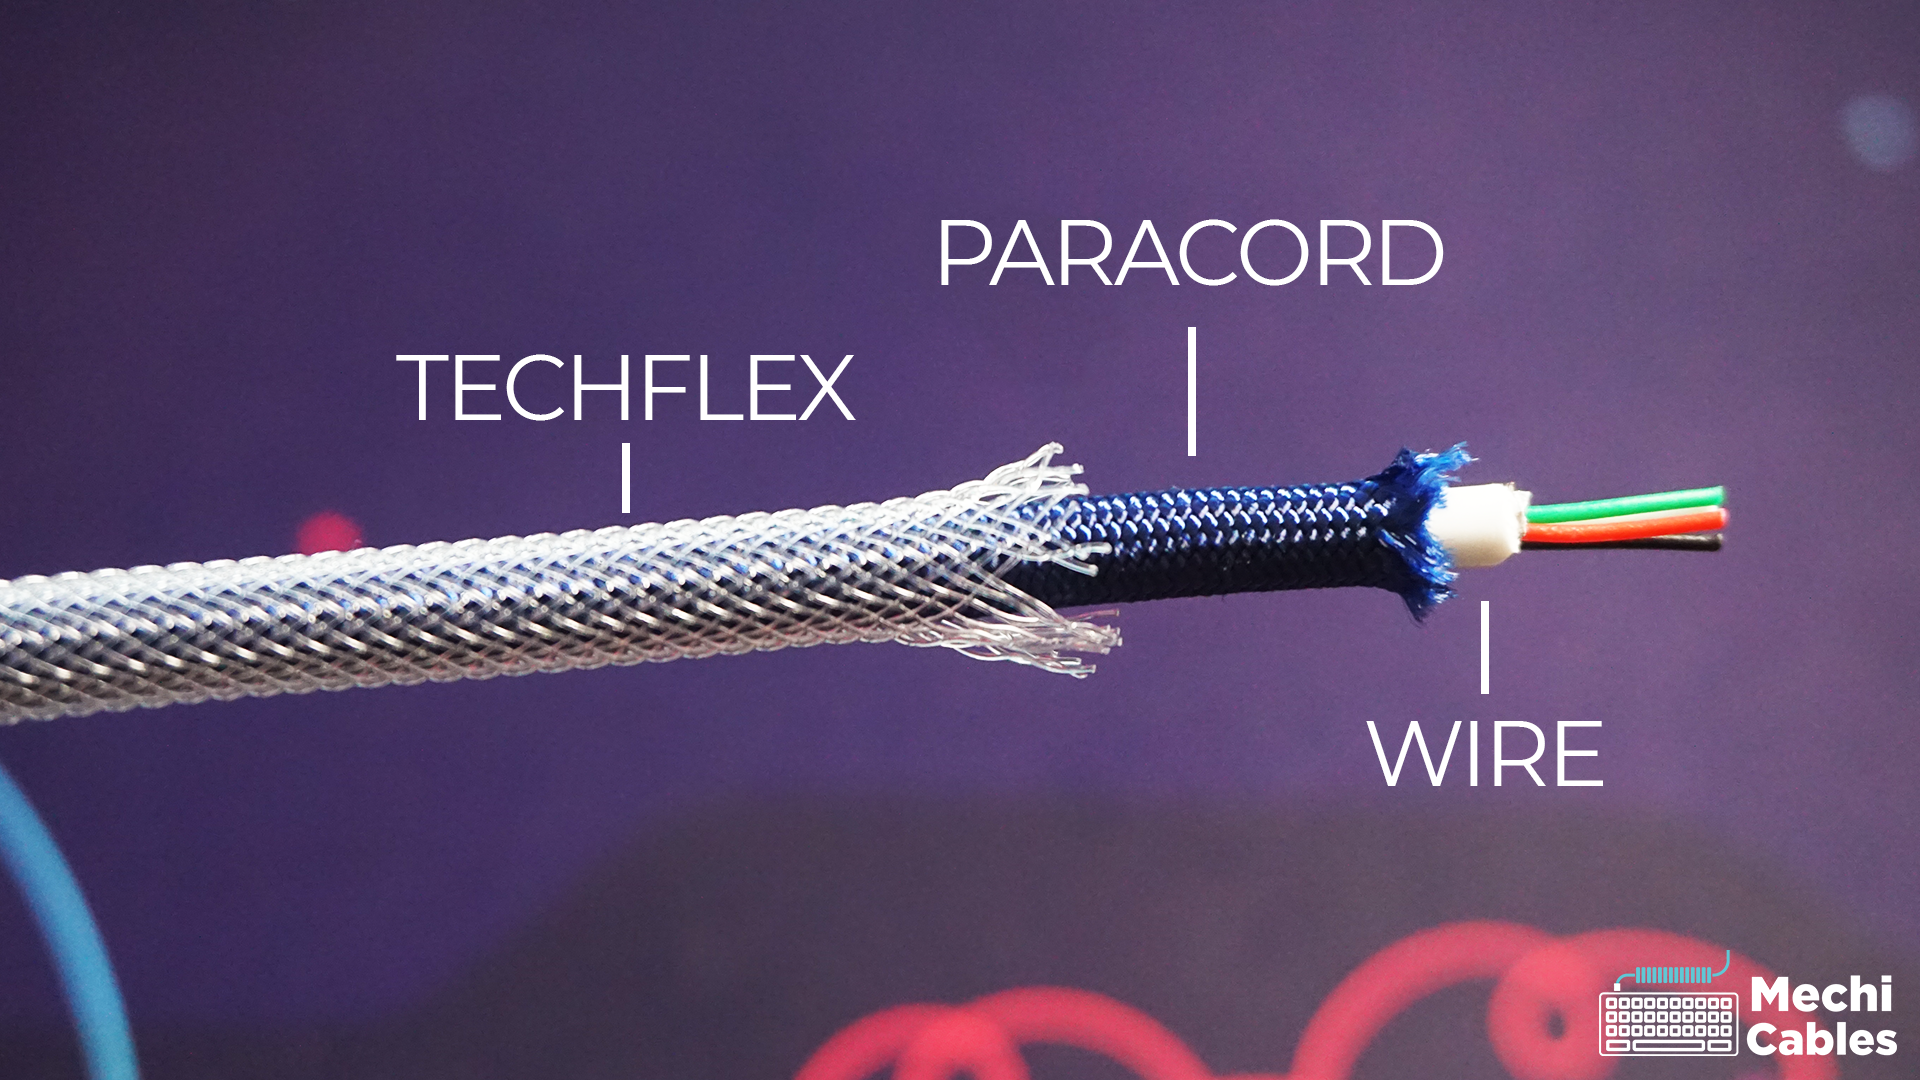
1. Cable – 28 AWG wire
This 4 core wiring is standard for most mechanical keyboard USB cables, it provides power and signal to your keyboard. There are larger versions of this cable for more power heavy devices but this particular wiring covers just about every single keyboard on the market right now. Basically everything in the kit wraps around this wire to create your cable so this is always the first part you start with.
2. Paracord (Inner Sleeve)
Paracord is commonly used as the initial sleeving for most keyboard cables. This nylon wrapping will be the base colour of every cable.
3. Techflex (Outer Sleeve)
Techflex is our outer sleeving, wrapping around the paracord which wraps around the cable wire. It is a woven nylon mesh that has a plastic feel but is very flexible. This material adds texture and protects the wiring. It also helps add contrast to the paracord making the colour options feel infinite. Techflex applied to the paracord covered wire will open up a bit so you can still see the paracord underneath. You don’t always need techflex, in fact I make plenty of cables that are just single sleeved (just paracord) but, the techflex is a great addition as it provides protection to the wiring and helps increase quality of coiled USB cables by making them more firm, allowing for a better coil after it has been heat treated.
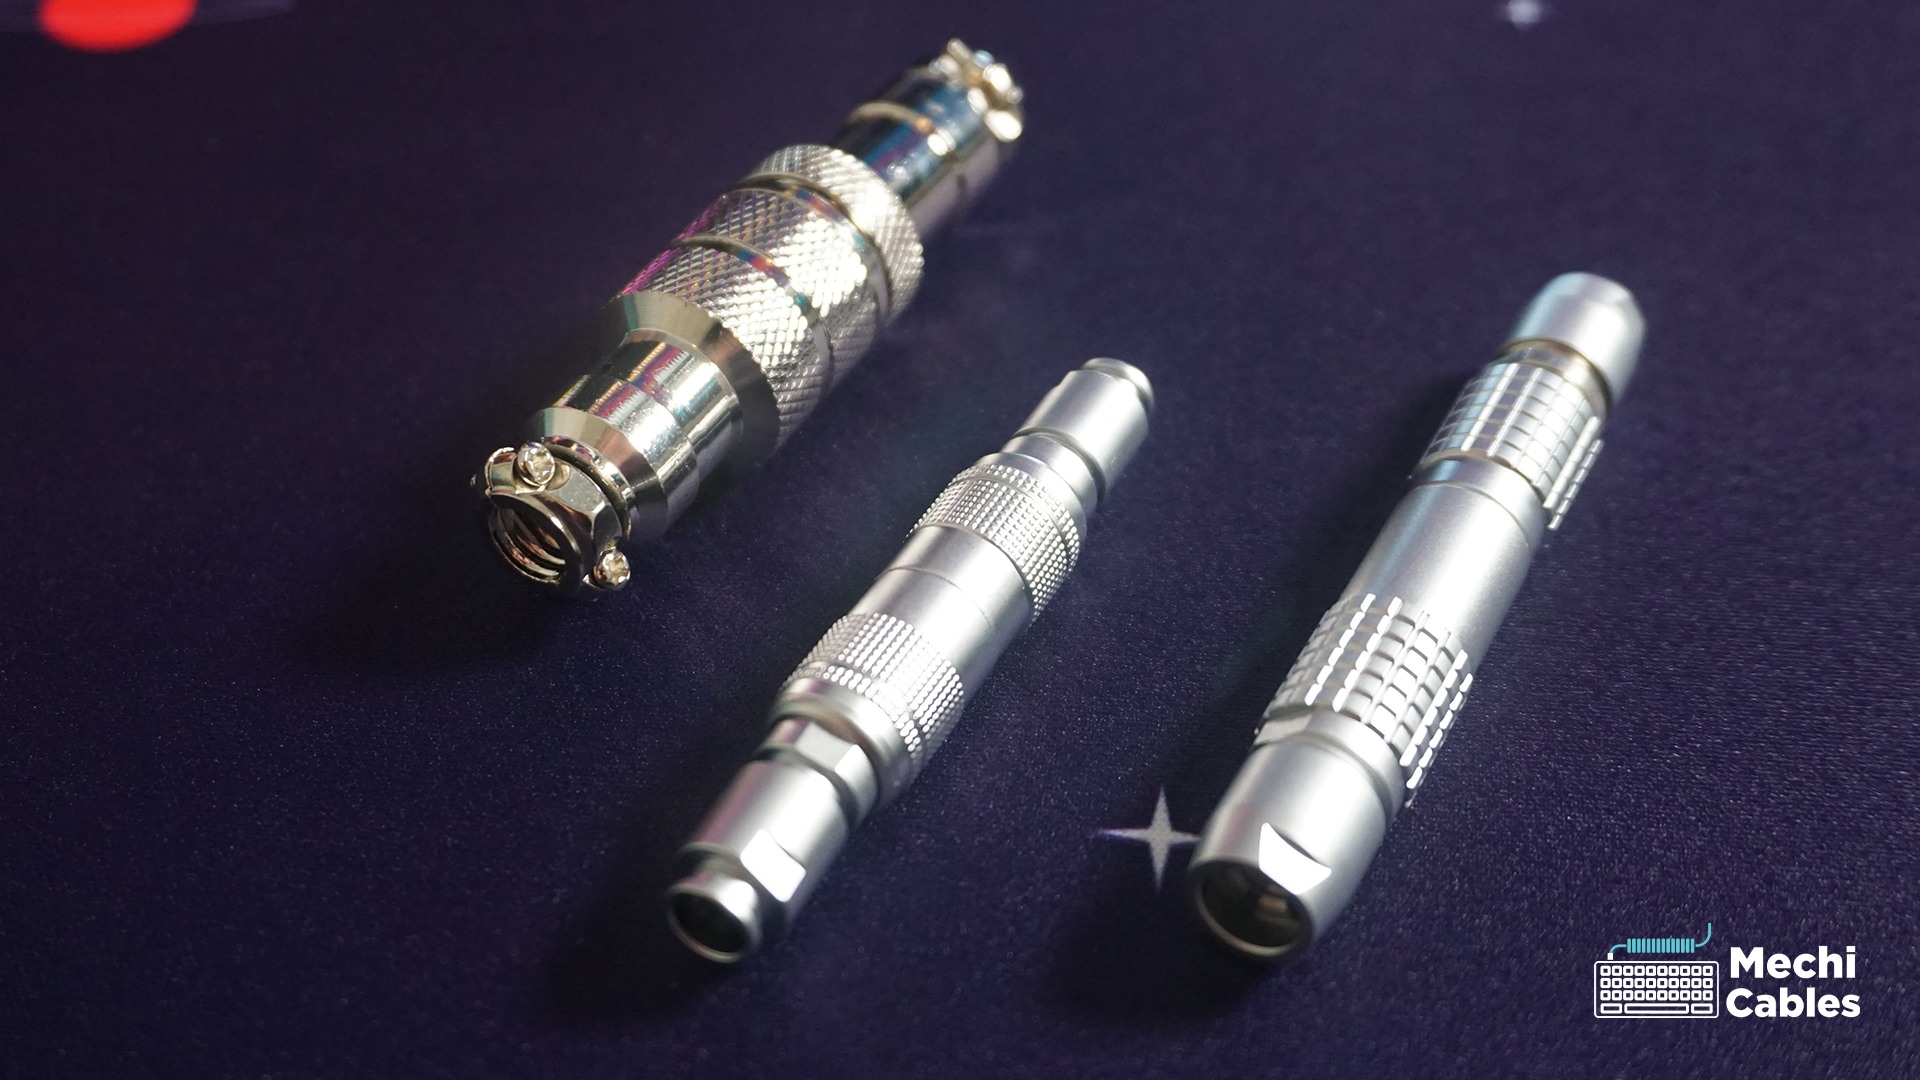
4. Quick disconnect
These components are pretty much just for looks. Some people like using them to do quick keyboard swaps where you change out the usb device part of the wire to accommodate keyboards with different USB ends. Overall they are a beautiful addition to the look and feel of your desk setup but not necessary. They come in many different kinds (GX16, LEMO, YC8) but we can go over that in a different blog/video. They all serve the same purpose and are all 4 pin connectors to run your wiring through.
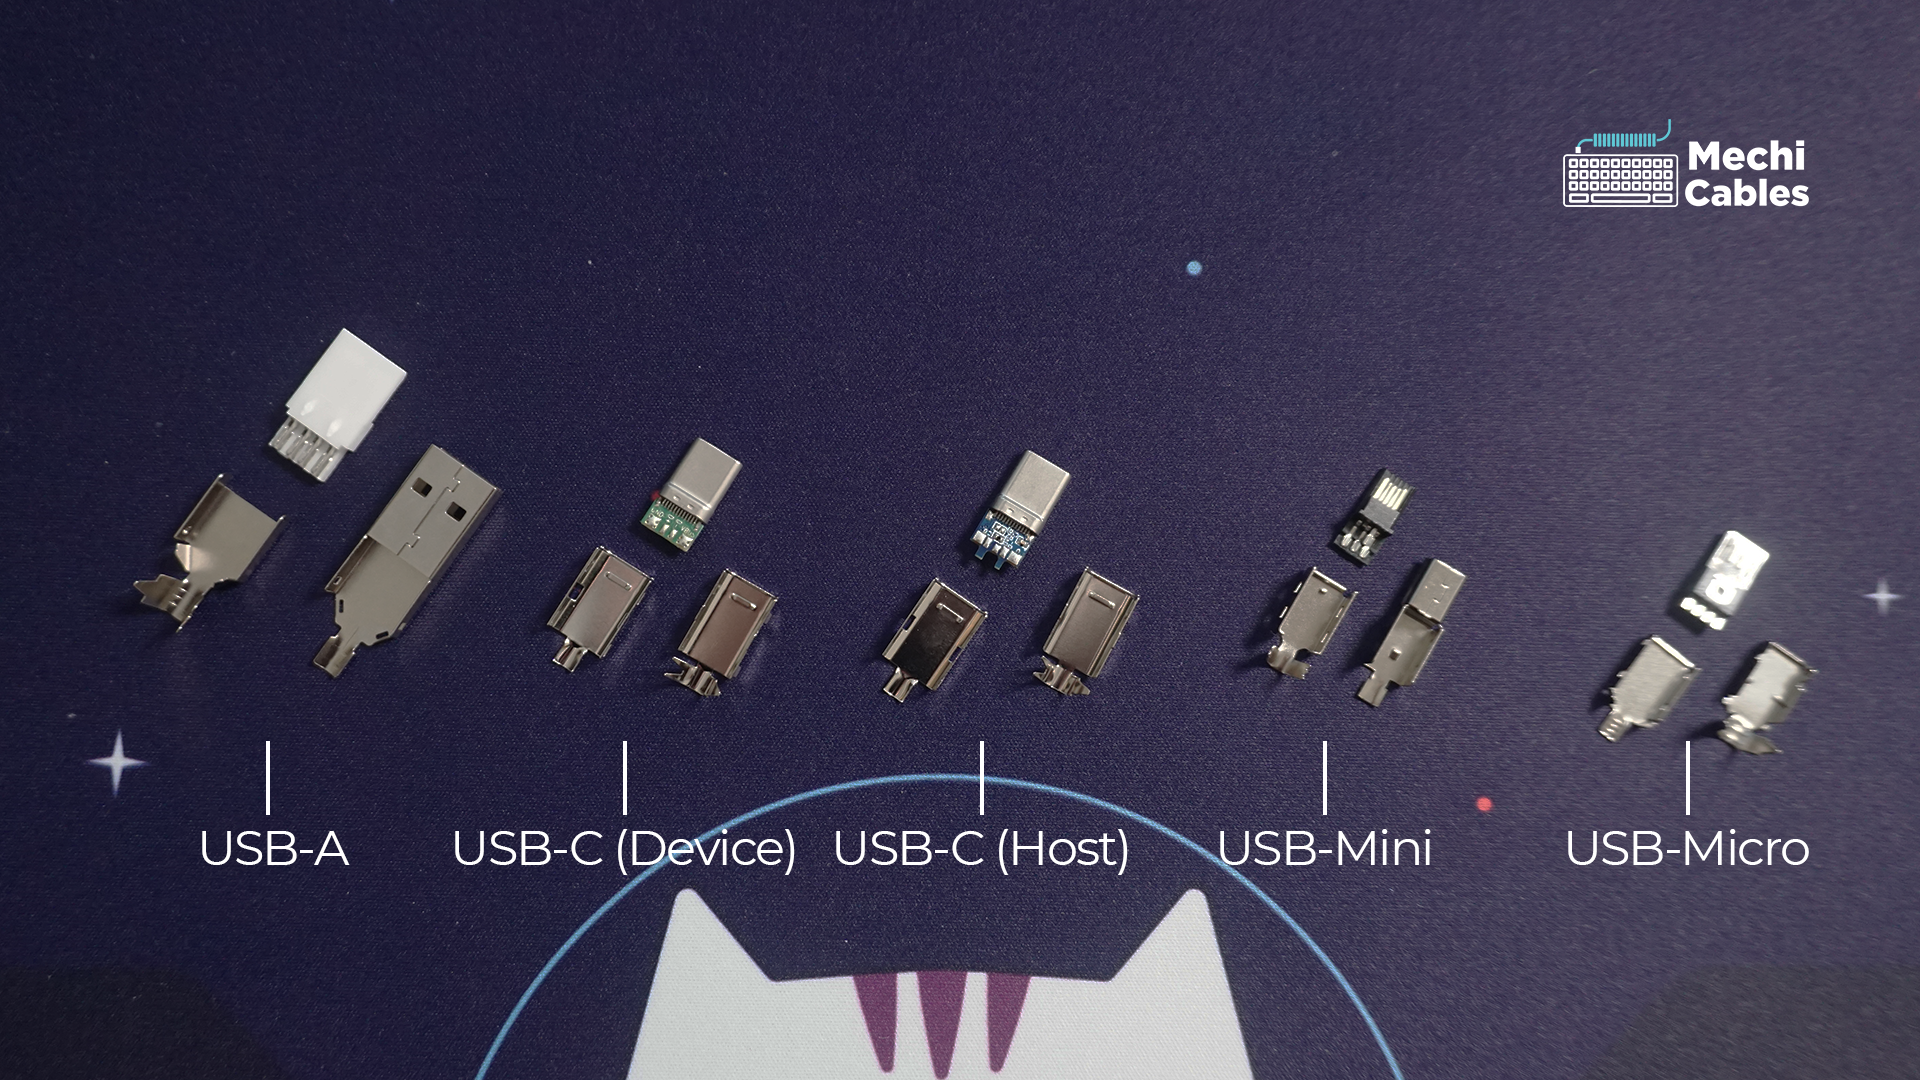
5. USB Host (Typically USB-A)
This is your standard USB that plugs directly into your PC. Typically, you need a USB-A but there are setups that you will need a USB-C (typically these are your MAC laptop users). Keep in mind with the USB-C that there are 2 different versions. USB-C host and a USB-C device. Those USB-C’s are not interchangeable meaning the host only works on the PC side and the device will only work on the keyboard end. You must be aware of that when putting together a USB-C to USB-C cable. But for most of us we can safely focus on the USB-A as our host plugin and move on.
6. USB Device (USB-C, USB-Mini, USB-Micro)
Standard USB 2.0 keyboard plug-ins. The most common used device plugin currently is a USB-C but you will notice some keyboard using a USB-mini. Typically the micro is reserved for macro pads but that is not exclusive so be aware of which end you need for your keyboard (this is also why some individuals like quick disconnects, to swap out the keyboard cable device end on the fly.
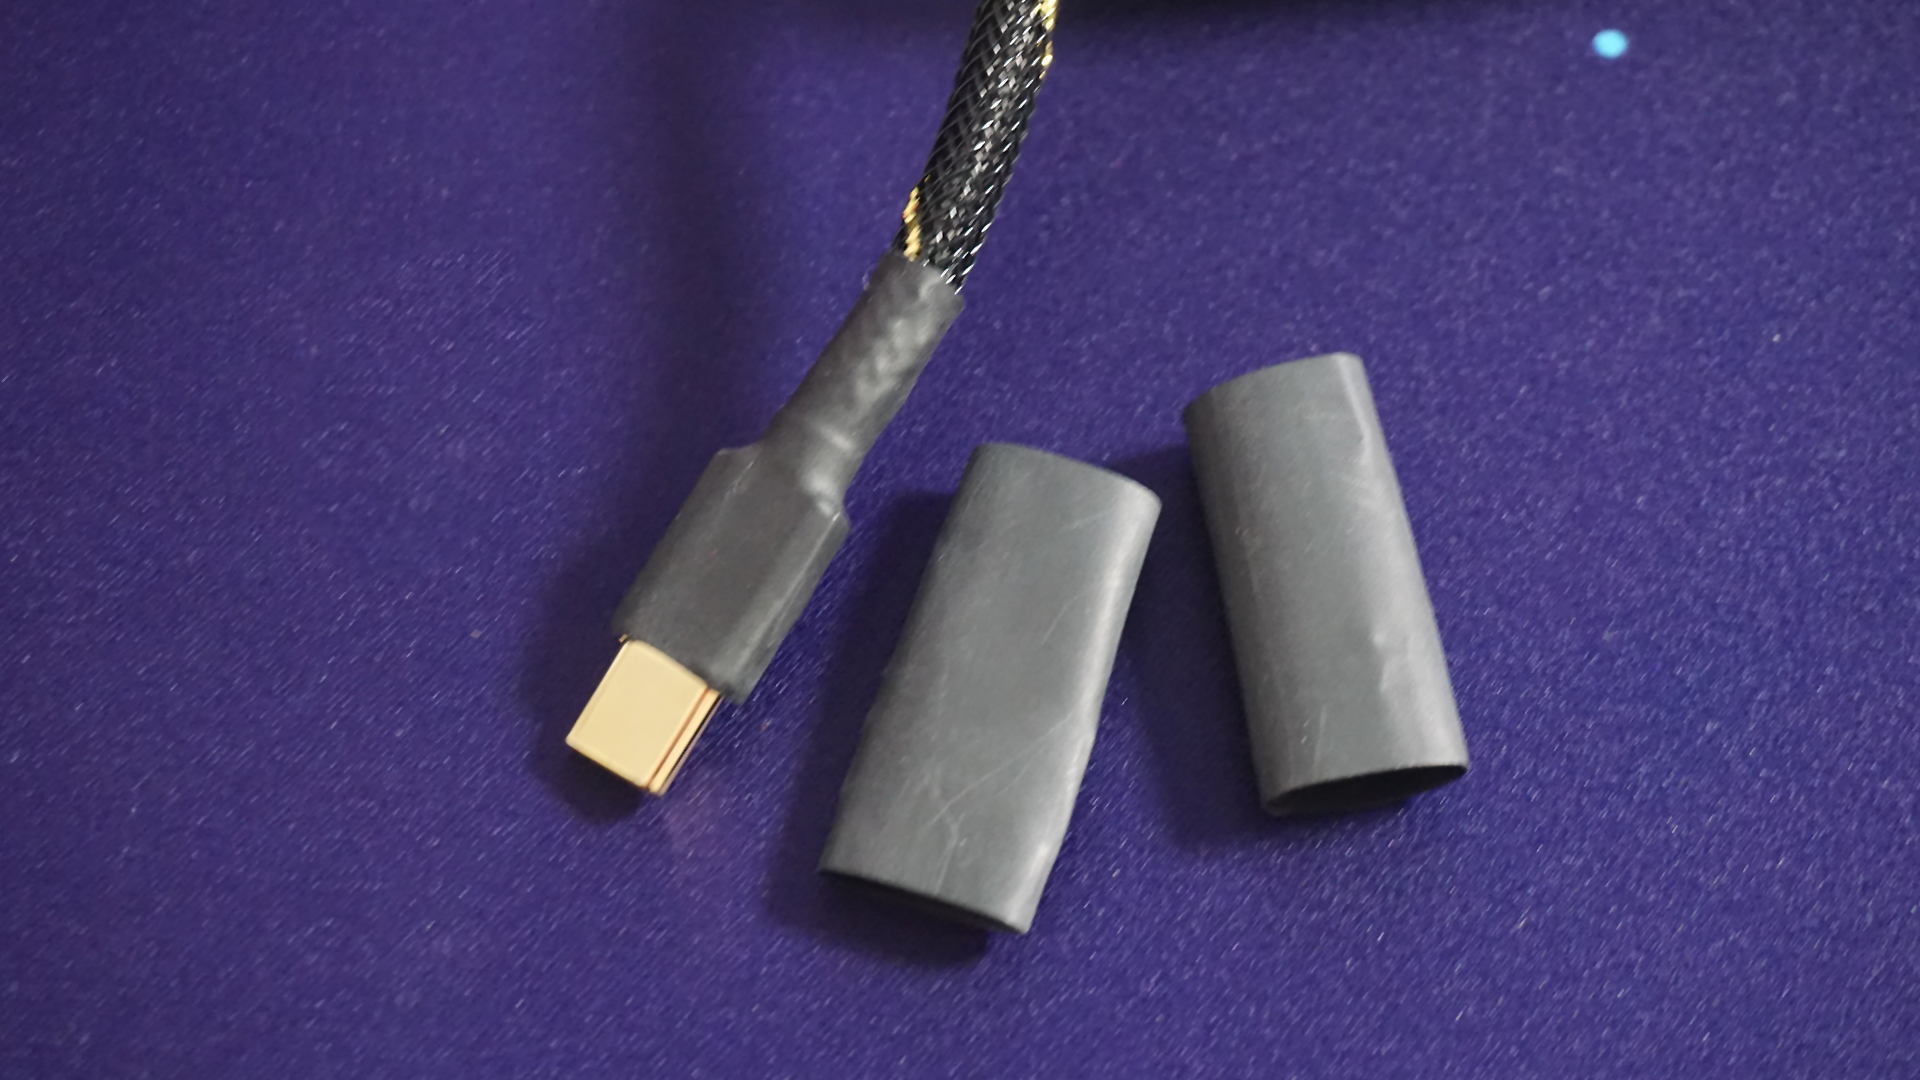
7. Heatshrink
Shrinkable plastic tubing used to wrap USB ends. This is a great way to add one more layer of protection to the USB and hide any small defects where you trim your paracord and techflex. Heatshrink comes in a variety of colours so you can pair or contrast your colours and really finish off your cables cool look.
So there is your parts summary for a standard keyboard USB cable. Every cable uses the same list of parts; there’s just lots of colour options to pick from. Once you have your parts figured out the only other option to consider is do you want a straight cable or something with a bit more wow factor like the coiled cables. Nothing is really different about them other than looks, the coiled cable will require more material but the parts are exactly the same.
I hope this little explanation helps new mechanical keyboard hobbyists define all the USB cable parts. If you have further questions regarding parts feel free to contact me, or check out my YouTube channel for tutorials on how to put this all together and make your first custom cable.